Kindergarten Pancakes

So let’s see what has happened since my last post….oh yes, summer. I guess four months of sunshine, beaches, gardening, and holidays kept me busy.

September brought along a pretty big deal around here, Lila started Kindergarten. Every morning she hops on the bus with her pals and off she goes. As a stay at home mom, it is a big change to suddenly pull one of the kids out of the mix every day from 8am to noon. It has been great: she loves the whole school experience, and it gives me a little break to catch my breath and let the boys enjoy the extra one third of the spotlight for a change.

Starting school has meant that all of a sudden we have a set routine and schedule to follow every morning. This is sort of new territory around here. With the exception of the odd doctor’s appointment, I usually don’t plan on leaving the house with the kids until after 10am, once morning naps are done and I’ve consumed an adequate amount of coffee to feel ready to take on the day. This means that for the last few years I have generally woken up around 7am and had about three hours to get the kids fed, dressed and ready for a public appearance. I guess you could say our mornings have been leisurely.

Now, although I really only have to get Lila ready to leave by 8:15, the kids all still eat breakfast together. In the past, since most mornings did not dictate strict time constraints, I suppose I may have been a little too accommodating with breakfast requests. I quickly realized this during the first week of school when I went to the cupboard on Thursday morning and asked the kids whether it was going to be cereal or toast. All I heard in response from Lila was “How come we never get pancakes anymore!?!” followed by Finn “Yeah Mom, why no waffles?!” Apparently the 5 days since their last pancake fix on the weekend was killing them. I tried to explain that it was a school day and we didn’t have time to make pancakes right now, but it didn’t go over well. I made a deal that I would make pancakes tomorrow, poured the cereal, and thought that was the end of it.

Fast forward to next week Wednesday morning, a similar situation unfolds with with demands for pancakes, waffles, crepes, or “ok mom, just french toast is fine” ringing out at 6:55am. Now I know not everyone is interested making pancakes multiple times a week, but I do like making breakfast from scratch for the kids. You can pack a lot of nutrition into a pancake, something which I think most boxed cereals seriously lack, and they seem to fill them up for longer too. I decided to let the kids pick one day of the week to be pancake day so that I could be prepared and they could have their cake and eat it too.

This is a recipe that has evolved from many many pancake mornings around here. The ingredients are things I usually always have on hand, and throwing a ripe banana into the mix adds sweetness without extra sugar. If you want to speed things up in the morning, you can get all the dry ingredients ready to go the night before, and mix it up from there when you wake up. This week I walked into the kitchen at 6:51, by 7:17 all the kids had eaten, the coffee was ready, and Lila was off getting dressed. The recipe makes about a dozen pancakes; Lila likes to take the left overs to school to eat cold as her snack.

IMG_6925

IMG_6927

IMG_6938 IMG_6943 IMG_6947 IMG_6957 IMG_6963


Whole Grain Banana Pancakes

  • 1/2 cup large flake oats
  • 1/4 cup whole wheat flour
  • 1/4 cup all purpose flour
  • 2 tbsp ground flax
  • 1 tsp baking soda
  • 1 tsp baking powder
  • pinch of salt
  • 1 ripe banana
  • 1 egg
  • 1 tsp vanilla
  • 1/4 cup plain greek yogurt
  • 3/4 cup milk
  • 1 tbsp melted butter

1. In a food processor or blender, pulse the oats until ground into a flour. Add rest of dry ingredients and pulse to combine.

2. In a large bowl mash up the banana with a fork, add egg and whisk to combine. Add vanilla, yogurt, milk, and melted butter, whisk all together.

3. Pour the dry ingredients into the wet and stir just until combined. Let batter rest while allowing the frying pan to heat up over medium heat (if you are worried about the pancakes sticking grease it lightly with butter).

4. When pan is hot, drop in the batter by 1/4 cup or so and allow the pancakes to cook for 2-3 minutes, until bubbles form and the edges begin to dry. Flip the pancakes and cook for another minute or so until cooked through. Serve hot with maple syrup.

Notes: This is the recipe exactly as I made it this morning, but I regularly play with it based on what I have on hand or how I am feeling that morning. I have used buckwheat flour instead of whole wheat, gone full whole wheat without any white flour, added wheat germ instead of flax, added both wheat germ and flax…you get the picture 🙂 Also, buttermilk is always great for pancakes if you have some in the fridge to use instead of milk/yogurt, and coconut oil works well in place of butter! I usually throw 1/4 cup of unsweetened coconut into the food processor when I go that route. Keep the wet to dry proportions similar, don’t over mix the batter, give it a 5-10 minute rest while the pan heats up, and all will be well!

Spring

Well it is official – spring did indeed arrive. You can tell by my lack of blog activity.  Someone should have warned me that blogging is best done in winter when there is little else to do but hide from mother nature in the evenings. I’m sure most people are the same way. Spring always brings about a surge of energy that usually results in some house projects being dreamt up. So far I have painted my kitchen and hallway, began contructing a new coat rack for the back entryway, started to prep our patio area for a new deck, and spent way too many hours planning, planting and weeding my garden. Who wants to be inside when things like this are popping up in the yard?

IMG_6471

I have been slowly working on my perennial garden for 4 years now and I am starting to see the rewards – I would love to have fresh cut flowers in my house all summer long. If you have any tips or favorites for prairie gardens please pass them on!

One sure sign of spring around the prairies, and one of the first garden crops to be enjoyed, is rhubarb. It is hard to walk through a yard or alley in Saskatoon and not see a one of these.

IMG_6477

I put this plant in last summer and I have to admit, at first, I was surprised how well it came up and was producing. Then my friend Amarah asked if I wanted some rhubarb again this year (she was kind enough to pass some on to me last year when I didn’t have a plant of my own). I think her words were “Do you want some rhubarb? My mutant plant needs to be cut back.” Well let me tell you, the size of the bag she gave me quickly killed my pride in my little plant! Oh well, hopefully in a few years I’ll catch up to her.

Aside from pulling stalks out of the ground and eating them dipped in sugar as a kid, when I think of rhubarb I think of a recipe my mom used to make every spring: stewed rhubarb. She happened to have some last July when we went to visit. Lila loved it. She loved it so much that when our rhubarb started poking out of the ground this spring she asked if I would make it for her. How can you say no to that? Here is my take on the recipe. Lila asked for it at every meal today. We like to eat it plain on its own, with yogurt and granola, or as a topping for ice cream or rice pudding. I think it would be really good served along side some Brie cheese on a cheese plate too. Hopefully it will last long enough for me to give it a try!

Stewed Rhubarb

  • 8 cups rhubarb chopped 1/4″-1/2″ thick
  • 1 cup sugar
  • 1 Tbsp grated ginger (I like to keep a piece in the freezer. It grates into almost a powder)
  • zest and juice of 1 lemon
  • 1 vanilla bean, scored with a knife down one side
  • 1 Tbsp water

1. Place all ingredients in a large pot and bring to a boil over med-high heat. Once boiling, reduce heat and partially cover, simmer for 15-20 minutes stirring occasionally until rhubarb has softened and started to break down. Remove vanilla bean, scrape out the seeds and stir into mixture. Let cool and place in jars or container, refrigerate.

IMG_6422

IMG_6439

IMG_6441

IMG_6456

IMG_6460

*This recipe is still fairly tart. If you like things on the sweeter side, you could use an orange instead of a lemon, or up the sugar amount a bit. Watch the mixture while you are cooking it. I like some chunks of rhubarb still intact and if you cook it too long it will all break down. The taste won’t be effected at all, just the texture. Also, if you can, use rhubarb that has really red stalks. It will make a big difference in the appearance. Green stalks can look brown when cooked.

-Sarah

Challah

I have to share this bread with you. I am by no means a challah expert, but it is my new favorite bread to make. I don’t know if it is the sweet richness of the dough, or just how beautiful it is to look at that makes it so wonderful, but trust me, the extra effort spent googling how to braid dough is worth it.

One of the great things about challah is you can tweak it so many ways. My first attempt was a sweet version with figs and orange zest kneaded in to the dough before braiding.  A plain loaf is perfect on its own too, and if you are lucky enough to have some left over in the morning, it makes awesome french toast. For Easter dinner this year I made a savory version with roasted garlic and rosemary, each strand formed like a cinnamon roll, with the garlic and rosemary tucked inside.

The dough recipe I use is from Smitten Kitchen. Once you have the dough down pat the rest is up to you: sweet, savory, and a multitude of different braiding options for different shaped loaves. My only advice is to pick a braid you like and watch a youtube how-to video. Online diagrams and photo instructions are more confusing and harder to scroll through on your phone with flour covered hands. This loaf is a six strand traditional braid.

IMG_6345

IMG_6347

IMG_6351

IMG_6354

IMG_6359


IMG_6357

IMG_6360

IMG_6361

IMG_6366

IMG_6383

As I was finishing up my braid while following along with a Youtube video, Lila proudly shouted, “Mom, you beat her! You’re the champion!” I guess it turns out I won the challah braiding race. And you know what, I have to admit, when you take a beautiful loaf of bread like this out of the oven it’s pretty hard not to feel like you’ve accomplished something special.

Roasted Garlic & Rosemary Challah

1. Prepare dough as directed. After it has risen, divide it into 6 equal portions. Roll out each piece into a rough rectangular shape, spread with roasted garlic, sprinkle with rosemary and sea salt and roll up. Using hands continue to roll and stretch each piece until it is around 13-15″ long.

2. Braid the strands (how-to video here)

3. Place loaf on parchment lined baking sheet and brush with egg. Let rise 1 hr.

4. After 1 hr, brush loaf again with egg and sprinkle with sea salt. Bake for 35-40 minutes in 350F oven, turning loaf halfway through so it browns evenly. You can test the loaf to see if it is done by knocking on the bottom. If it sounds hollow it is fully cooked.

-Sarah

Happy Easter

Last weekend Lila went for a play date at my friend Guylaine’s house. When I was chatting with Guy before dropping Lila off she mentioned they were going to be making Pysanky, Ukrainian Easter eggs. Later when I picked Lila up and she proudly showed off her prized egg, I was amazing by the memories it brought back from my own childhood: my grandmother’s pysanka collection tucked safely away in a glass display cabinet; the course I took with my mom when I was 8 or 9 learning how to make them; our own collection of eggs.

Since having kids I always find myself missing home just a little bit more around holidays. I miss knowing there will always be a big get together; a chance to reconnect with extended family and friends. I miss the traditions and I want my kids to experience them too.

I guess that means it’s time for me to start carrying over those special traditions I reminisce about each holiday. This year we bought a Pysanka kit. I’ll admit it got a little hairy at times. If you would have asked me how I felt about placing four jars of extremely colorful permanent dye, some sharp pointy things called kiskas AND an open flame all within Finn’s reach on any other day I would have looked at you like you were insane. But we made out just fine. Not a single egg was smashed and our collection is off to a great start.

IMG_6265


IMG_6276

IMG_6277

IMG_6280

IMG_6283

IMG_6301

Happy Easter 🙂

-Sarah

Spring Style Steals

Spring has sprung.

I think it is actually safe to say it. I am even going to go so far as to say I may possibly put away the winter coats for the year this afternoon. Saying goodbye to winter means it is time to say hello to some new wardrobe items.

I always get the itch this time of year to totally revamp my closet; however, the reality is that most of us don’t have an unlimited budget to do so routinely. One thing I have learned over the years is to shop smarter and plan ahead. I always have an ongoing “wishlist” on my iPhone of things I would like to have. The list helps me avoid impulse buys or investing in something that may really just be a passing trend. If you have a clear idea of what you are looking for and can be patient in your search, there are usually some pretty good deals around to be found as well. Also, I love thrift shops and Etsy. The deals are amazing and it is always exciting to find a cool vintage piece or something from a high end label for roughly the same price as a latte.

Here is what I added to my wardrobe this spring. I like having outfits that I can dress up or down simply by switching out my jacket and shoes. It’s more practical to buy things that I can wear for both a walk to the park with the kids or out for a coffee with a friend. I even managed to get all 5 items for less than $150.

IMG_6174

IMG_6191

Jeans: Lately I have been liking lighter washed, more relaxed skinny styles. One of my favorite places to shop for jeans is Value Village (ok, I’ll be honest, it is one of my favorite places to shop period).  A few weeks ago I found a really nice pair but they were a dark, raw denim. Since I liked the fit and they were only $6.99, I decided to try my hand at DIY bleaching. It took some time, and a few soaks in a bathtub bleach solution, but the end result is pretty darn close to what I was going for.

Before & After:

IMG_6085     IMG_6218

Boyfriend Shirt: Last year was all about chambray, but this year I’m seeing a lot more classic menswear-inspired shirts being worn in fashion blogs, particularly blue striped ones. I decided to take a look through the mens rack at Value Village and found a really good quality shirt that was exactly what I wanted, for a whopping $4.99.

IMG_6213

Flat clutch: This is an item that has been on my list for almost 2 years. Clare Vivier made the style famous and I have been searching for a more affordable option since I first saw one of her bags in a magazine. About a month ago I came across Anything but Plain Jane, a shop on Etsy selling handmade leather clutches and iPad cases. The bags are beautiful and you can request custom orders if you don’t see exactly what you like in the shop’s inventory. I ordered a small flat clutch in pebbled black leather and I love it.

IMG_6152

Sweater : I was visiting my best friend in Calgary last spring and she had an awesome chunky long cardigan she was wearing out as a jacket. It looked so cozy – perfect for spring weather when it can still be cool enough in the morning that a light coat doesn’t quite cut it.  Really long cardigans are harder to come by so I was very excited when I found this one in the clearance rack at Winner’s for $12.00. It is comfy and warm, and it has been getting  a lot of wear this past week!

IMG_6220

Trench Coat:  Nothing says spring like a trench coat. I have wanted a vintage trench for years but haven’t had any luck finding one in my size. In February a few local shops got together and had a huge clearance sale. I found a great deal on a coat from Luna & Hill (one of Saskatoon’s best shops by the way!). Buying things out of season is a great way to take advantage of sales and save money. One thing I really like about this coat is that is was made in Canada by a Montreal based designer. These days it is unfortunately pretty rare to find clothes that say “made in Canada” on the tag and it is nice to support local when you can.

IMG_6190

Jeans: Nudie; Shirt: Giorgio Armani; Sweater: A. Gianetti, Coat: Valerie Dumaine Clutch: Anything but Plain Jane; Rubber boots: Hunter; Ankle boots: House of Harlow


Rest & Pizza

Sorry it’s been a while. I hit a road block when my DIY denim bleaching project didn’t go as smoothly as I intended. Then the boys got sick while Rob was away on a fishing trip resulting in some very long nights and a very tired me. Needless to say I was more than grateful for Rob’s return; this mama needed some rest. A few days later things started to get back to normal, and normal for me often means staring into the fridge at 3 o’clock scrambling for an idea of what to make for supper. So once again there I was staring into the fridge, being peppered with questions of what’s for dinner by the kids, when I saw this:

IMG_6129

A good friend of ours had come from BC to go on the fishing trip with Rob and he happened to bring along some homemade wild game salami. Salami and last minute supper scrambles can only mean one thing: pizza.

Everyone loves pizza. Once you get the hang of working with dough it is really one of simplest suppers to throw together. If you are new to making dough this is also a great place to start – anything that is eventually going to be covered in cheese is pretty forgiving!  Flexible to the ingredients you have on hand, pizza can even effectively deliver all four food groups directly into your kid’s mouth in one delicious bite. Usually I make a whole wheat crust and serve it with a salad to call it a fairly healthy weekday meal. But then sometimes I ditch the whole wheat and substitute a nice glass of red for the salad instead. Either way works for me.

IMG_6122

IMG_6124

IMG_6125

IMG_6136

IMG_6143

Pizza Dough

This recipe makes 2 pizzas. Today we had one salami and mushroom, and one imitation Nino’s Four Cheese (the only pizza in town we ever actually go out for) a combination of mozzarella, cheddar, feta and parmesan topped with fresh tomatoes after baking.

  • 1 cup hot water
  • 1 tsp active dry yeast
  • 1 tsp kosher salt
  • 2 tsp olive oil
  • 1/2 cup whole wheat flour
  • 2 1/4 cups white flour
  • cornmeal for pans
  • sauce & topping of your choice

Place hot water in large mixing bowl and sprinkle yeast over top. Let rest for 5 minutes or so until it foams up. Stir in salt and olive oil. Add whole wheat flour and stir well. Next stir in the white flour, 1/2 cup at a time until you can’t stir effectively anymore (usually I can’t stir anymore after adding 2 cups). Scrape out mix onto counter and knead in the last 1/4 cup of flour until the dough is no longer sticky. Knead for roughly 5 minutes and then place in an oiled bowl, covered with plastic wrap and let rise for 1 hour (if you need to use a little more or little less flour no big deal – just aim for a nice smooth and elastic ball of dough at the end). While the dough is rising you can get all of your toppings prepped and ready to go. Sprinkle pans or a pizza stone with cornmeal to prevent the dough from sticking (a light grease of olive oil on the pans is ok too if you want).

After an hour the dough should have about doubled in size. Divide it in half and stretch or roll it out to fit your pans. Top the pizzas however you like and bake at 450F for  11-15 minutes until crust is cooked through and golden on the bottom. If you like the crust edges to really brown and crisp up you can brush them lightly with olive oil before baking.


Keep It Simple

photo-4

Is it just me or is it hard to get back into the swing of things after you have been on a holiday? It happens to me every time I come home from the cabin, and having now returned from my Phoenix getaway I am feeling a little slow moving this week. I guess it is the come down of knowing something you have really been looking forward to is over. Whatever it may be, it makes it just a little bit harder to keep cool during the meltdowns and fights, or to drum up something creative for dinner.

Returning to winter might not help either. I know no one wants to hear it, but man, winters with three kids at home can be hard. I don’t remember the cold getting to me as much before, but these last few years, by the end of February we are all done with being inside. Sunshine felt gooooood this weekend, so good. How amazing is it to go for a walk around the yard with a coffee in the morning and find citrus trees packed with beautiful fruit? Fresh picked grapefruit, oranges and lemons are never a bad thing, and they certainly aren’t a bad thing with some tequila thrown in the mix a little later in the day.

photo-3

Now that the tequila, sunshine and visits with some amazing friends have run out, what do I do to get myself back into my normal routine? I make granola. Or I should say Finn and I make granola. It’s our thing. It’s easy and possibly the least messy baking project you can perform with a 2 year old. This week I need easy. I’m keeping it simple and going with what I know.

I never really liked granola until I tried making it on my own. It started with the Rebar cookbook’s recipe which was my go to for a long time. Then one day I grabbed a coffee at Earth Bound Bakery and decided to order the granola and yogurt bowl – it was unbelievable (yes I know I am just talking about granola here).

After that bowl of granola I went on an embarrassingly long binge of scouring food blogs for recipes to try and recreate it at home. A few years and many batches later I came to realize that the beauty of homemade granola is you can’t really mess it up, and you get to make it exactly the way you like it. Swap the nuts, change the sweetener, ditch the dried fruit, use what you like and what you have in your cupboards, it really doesn’t matter. What matters is having your house smell deliciously amazing on another cold winter day, and having a quick homemade nutritious snack to feed the kids (or yourself) when you are needing just a little more sunshine.

IMG_6042

IMG_6050

IMG_6056

IMG_6062

Honey Almond Date Granola

I like to eat my granola with plain yogurt and fresh or preserved fruit. The kids usually have it plain with milk or on top of flavored yogurt. This recipe is not overly sweet; you can always increase the amount of honey if you like.

  • 1 1/2 cups large flake oats
  • 1/2 cup almonds, roughly chopped
  • 1/2 cup pumpkin seeds
  • 1/2 cup unsweetened coconut
  • 1/4 cup sesame seeds
  • 1/4 cup wheat germ
  • 1 tsp cinnamon
  • pinch of salt
  • 2 tbsp olive oil
  • 1/4 cup honey
  • 1 tsp vanilla
  • 2 tbsp water
  • 1/3 cup dates, sliced finely

Preheat oven to 300F.  In a large bowl combine oats, nuts, seeds, coconut, wheat germ, cinnamon and salt. Stir until well mixed. In a glass measuring cup combine oil, honey, vanilla and water, stir well with a fork. Pour wet ingredients into dry and mix well. Spread onto a parchment lined baking sheet and bake stirring every 15 minutes or so until golden. Mine usually takes around 45 minutes. If you find it is browning too fast, you can decrease the temp to 275F and stir more frequently. Allow to cool and then scatter over the sliced dates (they are usually quite sticky so I like to evenly scatter them to avoid one large clump). Mix gently and store in a large ziploc bag or container.

Substitutions: You can swap out the almonds for any nut you like, or a combination of a few too. I usually use maple syrup not honey, but we ran out on the weekend and grocery day is friday around here so I changed things up. Ground flax is a good sub for wheat germ, and I often will add other baking spices like ground ginger or fresh grated nutmeg. As for fruit variations, most of the time I just stick with oats and nuts, but dried cranberries or cherries work well in place of the dates too.

-Sarah

No Mommy Go

I’m going on a vacation. I don’t think it will really sink in until I am at the airport, but I am going to Phoenix for a girls weekend with some very wonderful ladies. It’s been over 5 years since I was last out of the country.  Finn is struggling with the idea of me leaving the house right now never mind the country. He very seriously told me at bedtime tonight “No Mommy go. Me keep you in house, EVER.” We will see how that goes…

While Finn and Lila will be hanging with Dad for the weekend, Malcolm is young enough that he will be tagging along for the fun. Packing for a girls weekend with a baby in tow is new to me. I’m trying to go as light as possible, partly because I will be lugging around a 20lb six month old, and partly because I want to have room to do some shopping while I’m there.

Here is my list of travel essentials for a mom and baby getaway:

1. Hair screws: Have you tried these yet? My friend Lesley introduced me to them and I haven’t gone back to hair elastics since. I love having long hair, but when running after kids all day I don’t love it always in my face or tangled up in little hands. These are great: simply twist your hair up into a bun and screw them in to secure (they stay put surprisingly well).  After the kids are in bed and you are ready to let your hair down (ha ha) you end up with nice beachy waves minus the annoying crease left when using elastics.

Goody Spin Pins spin pins

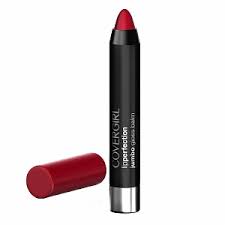
2. Covergirl Lip Perfection Jumbo Gloss Balm: Disregard the ridiculously long name, these lip crayons are great. I picked up a red shade and it is the perfect no fuss, no mirror necessary, daytime red lip. I generally don’t wear too much makeup during the day so it is nice to have a lipstick that is easy to throw on and makes it look like I pulled myself together. This is a nice lightweight balm that delivers a good shot of color and lasts a long time. I had a very similar product made by Tarte in the past which was also awesome but cost four times as much. Can’t go wrong with a great 8$ lipstick.

CG Lip Perfection Jumbo Gloss Balm in Ruby TwistUnknown

3. Black skinny jeans: The perfect pant when you want to pack light. They can be worn with just about anything, dressed up, dressed down, day or night. My current faves are a pair of Anine Bing classic black skinnies I picked up on an online sample sale, and my never fail J Brands.

Anine Bingimages   J Brand 811 2170_black_l

4. Great basic tees: I always pack one white and one black or grey t shirt. While it is hard to beat James Perse or Vince in the tee department, they are definitely a splurge. Not to worry though, the best discovery I have had in a long time shopping online is Everlane, an online store making all kinds of basics for men and women at really amazing prices (can’t beat 14$ for a t shirt!). Check it out – you and your wallet will thank me. Great tees are my go to for traveling because they are comfy for long days in the airport, can look great with a blazer and heels, and are also perfect for sitting around drinking some wine with good friends.

Everlane U Neck Tee (Pine)   Unknown-1

5. Leather Jacket: A leather jacket is kind of a no-fail, can’t go wrong item. It will always feel dressed up enough heading out in the evening, and can be thrown on over most anything if it is cooler during the day. Since Phoenix is hot right now I am taking a suede moto jacket on this trip. This jacket is incredibly light and easy to pack. It looks great over a summery dress during the day, or over an all black outfit in the evening.

Doma Cropped Suede Jacket Unknown-2

6.  Sunglasses: I have three young kids. Chances are on any given day I am looking a little tired, and a good pair of shades is the fix. Classic Ray Ban aviators are my choice. I cannot wait to put them to good use under some warm sunny rays.

Ray Ban Polarized Aviators    0RB3025__001_58-01

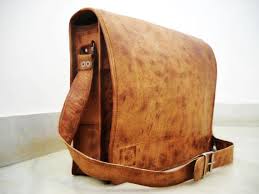
7. Leather Messenger Bag: When Rob and I were expecting Lila, I was on the hunt for a diaper bag that didn’t really look anything like a diaper bag. I wanted something that he or I wouldn’t mind carrying around and that maybe even once we were done with diapers still be able to use. I ended up finding a camel leather messenger bag on eBay and when Rob started asking me where the “man bag” was I knew it was a good choice.  I literally have not left home without it when my kids are in tow for the last 5 years and it still looks great.

Far Horizon Traders Messenger Bag    Unknown-3

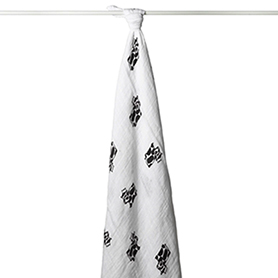
8. Aiden & Anais Swaddle Blanket: Best baby blanket around hands down. They are nice and big, excellent for subduing fussy babies, light weight to pack, a perfect nursing cover-up, and come in a million cute patterns. These are my go to shower/baby gifts for new moms.

Muslin Swaddle Blanket9011_1

9. ERGOBaby Carrier: Three babies and three carriers later, I was given an Ergo as a gift this year when I had Malcolm. It is by far my favorite out of the bunch. I am guessing during a 6 hr travel day I will be grateful for some handsfree time carrying Malcolm around. And hey, if Gisele can look like this wearing one, it can’t be a bad thing.

Gisele Bundchen & Daughter Vivian Departing On A Flight At LAX

10. And last but not least: The one thing I very rarely leave home with out these days.

IMG_6036

Bon Voyage!

-Sarah

Hillbilly Modern: A DIY Project

IMG_5993

What’s your style?

For a long time I remember feeling somewhat baffled by this question.  I had no idea what I really liked, never mind putting a label on it.  I remember when Rob and I moved into our first apartment, the first time I really had any sort of place to make my own, and wanting it somehow to look “nice” but not really knowing how to go about doing it. I was 21, a full-time university student, and lets face it, busy doing other 21 year-old things rather than decorating a 1 bedroom basement apartment (most of which probably involved drinking pints of beer). I also remember seeing a picture of a Danish Modern lounge chair on the cover of a magazine and thinking, “What kind of chair is that and where can I get one??”  That chair sparked my love of Mid Century and Danish Modern design, and also in a sense gave me a better understanding of how I wanted to style my home. Flashing back to the old 1 bedroom basement apartment days, our decorating scheme was slightly more hillbilly than Mid Century Modern. Have you ever had something like this in your living room?

IMGP0011

My husband is a shed hunter. A very good one as you can see. For those of you who are wondering what shed hunting is, during the winter in Saskatchewan, deer, moose, and elk “shed” their antlers and then begin growing new ones for the next year. Once the animals start dropping their horns  it is open season for  hunting enthusiasts to go out and try to find them. Sounds easy enough right? Well,  it is not. Really.  To find the beautiful and sought after trophy sheds it takes weeks of dedicated searching, mostly on foot, and often through knee-deep snow. Unfortunately around here these days the shed hunting time is pretty monopolized by three little kids, but Rob still tries to get out when he can. We’ve even taken the kids out twice. Enough for Lila and Finn to find their first horn, and for Rob and I to realize how much harder shed hunting is while carrying a small child through knee deep snow. All that being said, it really is exciting when you first spot an antler poking out of the snow.

IMGP3288

So, what do you do when you have an avid shed hunting husband mixed with a girl who has a taste for Mid Century modern? You compromise and find ways to make style work for both of you. I love our built in book shelves and think that Rob’s display of his fave sheds adds a unique personal touch to our living room.

IMG_6012

Even Lila is following in her dad’s footsteps proudly displaying the sheds she found on her dresser.

IMG_5987

So one day when I found myself rummaging through my terribly unorganized jewelry drawer (or maybe it was after yelling at the kids to get out of my jewelry drawer) I got an idea. I wanted a jewelry rack, so why not use an antler? And here it is: a DIY antler jewelry rack.

1. Choose a horn that fits your room and jewelry hanging needs (Rob could not understand why I would choose such a “piddly” horn but smaller was better for me)

2. Pre-drill a hole in the antler

IMG_5970

3. Screw the antler into the wall (I chose to use a black screw since it blended in well with the horn color)

IMG_5977

4. And just like that, you go from this:

IMG_5981

To this:

IMG_5983

I think it is the perfect medium, part hillbilly, part modern. I just might not be quite ready for an antler chandelier…

-Sarah

Happy Valentine’s Day

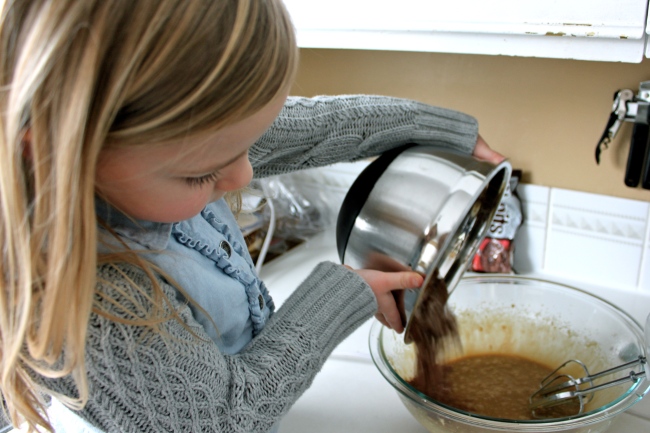
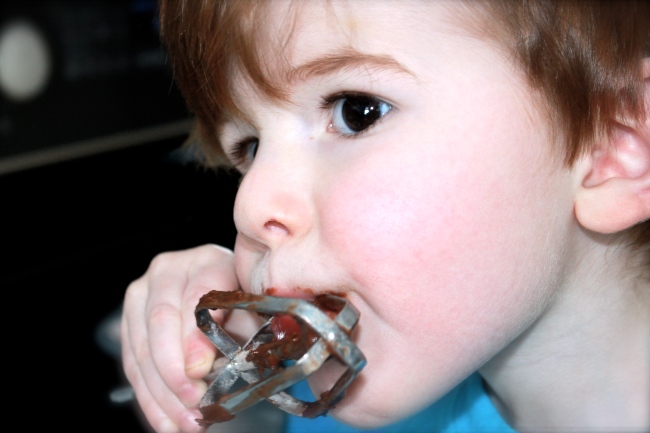
I figured I would get the ball rolling with a Valentine’s Day themed baking project with the kids. It’s been cold here this week so getting Lila and Finn outside to play in the afternoon hasn’t really been happening. Cupcakes seemed like a good answer to fight the winter cabin fever, even if most of my baking escapades involving my 2 and 4 year old helpers are usually a mess filled hour of chaos (hopefully squeezed in during one of Malcolm’s naps). I also noticed a bag of zucchini in the freezer that was from a friend’s garden last summer and thought it was probably time to put it to use (of course for some reason I always feel better feeding the kids cupcakes if they are zucchini chocolate).

These cupcakes are a collaboration between a couple of different recipes: one from the Best of Bridge and one from the Rebar cookbook. I swapped out canola oil for olive oil, and since I didn’t have buttermilk I used plain yogurt. I added a little bit of left over coffee from the morning because really, chocolate is just about always better with coffee. Lila was quick to point out that coffee was not supposed to be fed to children so I only added a couple tablespoons and told her not to worry. I also scaled down the measurements to make a smaller batch.  In the end they turned out to be excellent. The cake itself is nice and moist with a good deep, dark chocolate flavor.

.Image

Image

What it is really all about:

Image

Image

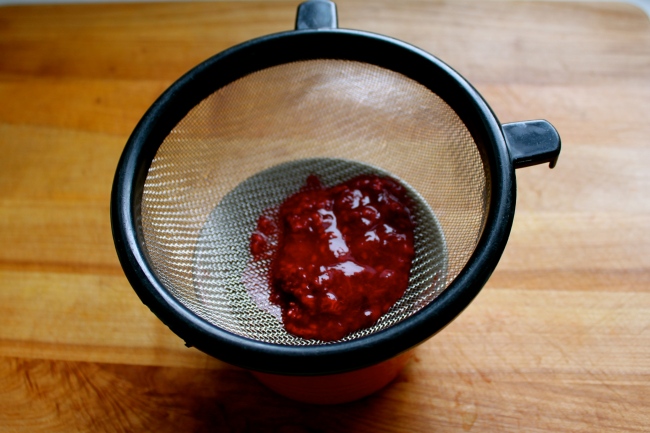
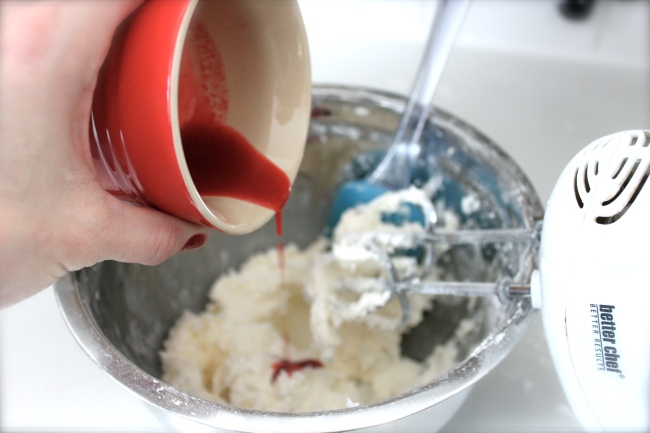
Luckily Valentine’s Day and Lila’s go to icing color of choice were a match. I decided to try and make pink buttercream by adding the juice of some thawed frozen raspberries instead of food coloring (every little bit counts right?!?)

Image

Image

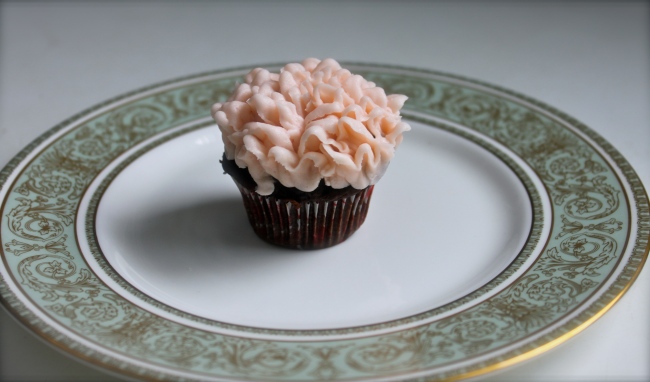
After a quick Youtube search on how to pipe roses onto cupcakes, followed by an epic fail and Lila once again piping in to add “wow, you’re not very good at that are you?”, we settled on Mini Berry-Pink Peony Cupcakes as our final product. I have always loved peonies…and these just happen to be delicious.

Image

Mini Chocolate Zucchini Cupcakes with Berry-Pink Buttercream

(makes 24 mini cupcakes)

Cupcakes:

  • 2 T softened butter
  • 1/4 cup olive oil
  • 3/4 cup brown sugar
  • 1 egg
  • 1/4 cup plain yogurt
  • 2 T coffee
  • 1/2 tsp vanilla
  • 1 cup flour
  • 1/4 cup cocoa powder
  • 1 tsp baking soda
  • 1/2 tsp baking powder
  • 1/4 tsp salt
  • 1/2 tsp cinnamon
  • 1/2 tsp allspice
  • 1 cup finely grated zucchini
  • 1/4 cup dark chocolate chips

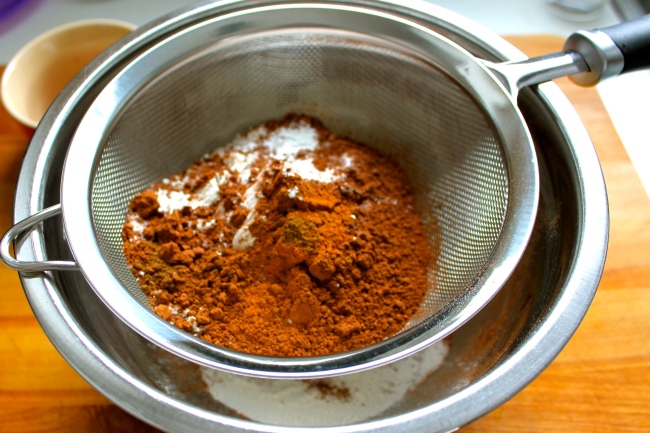
Preheat oven to 350F and line a 24 mini muffin pan with paper cups. Using an electric mixer cream together butter, oil and brown sugar. Add egg and beat until well incorporated. Add vanilla, yogurt and coffee, mix to combine. In a separate bowl sift together flour, cocoa, baking soda, baking powder, salt and spices. Pour dry ingredients into the wet and beat until just combined. Fold in the zucchini and lastly the chocolate chips by hand. Divide batter between 24 cups (mine were fairly full). Bake for 15 minutes, or until a tooth pick comes out clean. Allow to cool before frosting.

Berry-Pink Buttercream Frosting

  • 1/2 cup unsalted butter, room temp
  • 2 cups icing sugar, sifted
  • the juice of 6 frozen raspberries, thawed and pressed throw sieve with the back of a spoon

Using electric mixer beat the butter until smooth and gradually add in the icing sugar (in batches so it isn’t too messy). Once all the sugar has been incorporated pour in the strained raspberry juice and mix well. All the best with the rose piping!

*Note: the buttercream doesn’t have a noticeable raspberry flavor, but the color turned out really well. I’m sure you could increase the amount of berries for a stronger flavor and color.